Go to the page where the Virto Alerts & Reminder App is installed on your SharePoint site. If you do not know where to find it, ask your tenant admin for a direct link to the app. Then click the “Add Reminder” button.

Step 1: General information
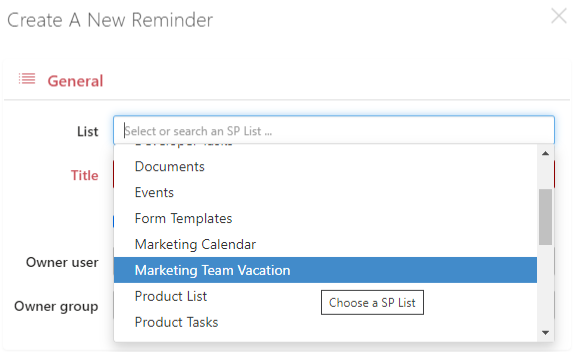
Fill in the first part of the reminder form—general information.
1) Choose a list or document library from the drop-down menu. Ensure you know the exact name of the list or library for which you want to create a reminder. The drop-down menu will display all the lists and document libraries you can access. In this case, we would like to notify someone about upcoming vacations in the marketing team.

2) Specify the title. This is how your reminder will be displayed in your alerts list.

The reminder owner is a user who can edit it. By default, you are the owner of the reminders you create.

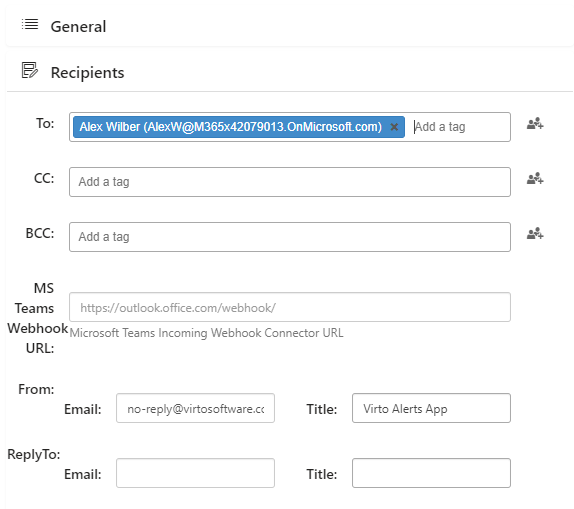
Step 2: Recipients
Recipients are users or groups who will receive this reminder. Start typing a user’s name or email to add them to the list of recipients. The other fields are not required, but you can make any necessary changes.

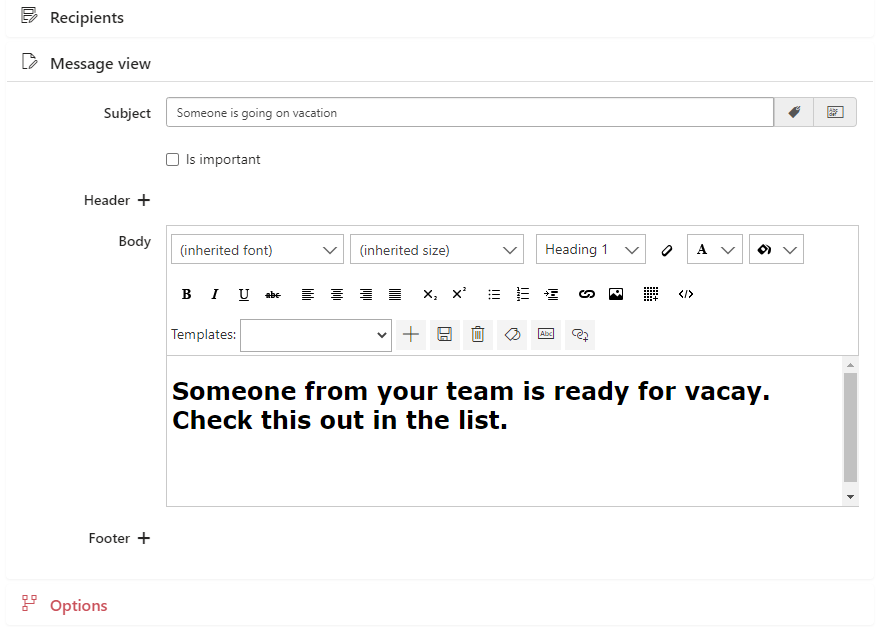
Step 3: Message view
Now, define what will be in your reminder message. Add the subject (which will display as the email subject in the recipient’s email client) and type the text of the message body.

Pay attention to the fields marked in red. These mean you haven’t completed some required fields yet. Return to them before saving the reminder.
Step 4: Options
Finally, decide when you want to send this reminder. For example, you wish to inform Alex when someone’s upcoming vacation will start. To remind Alex five days before the start date, choose “Send on date depending on field value” and add “Before” and “5 days.” The reminder will be sent five days before the vacation starts.

Your first reminder will appear in the “My alerts” list.

When five days are left before someone’s vacation, Alex will receive the reminder. You can apply more handy functions to your reminders. For example, you can add the name of a team member who’s going on vacation and add the direct link to the list. To learn how to do it, look at “Configuration and usage.”