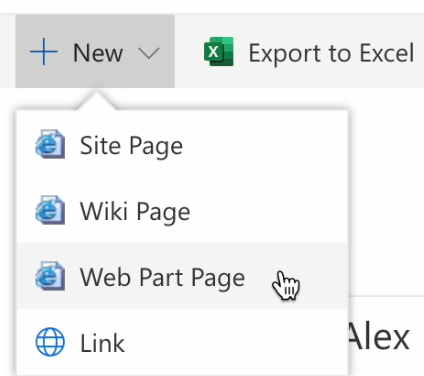
Adding the Virto Calendar web part to a SharePoint classic page
Wiki Page#
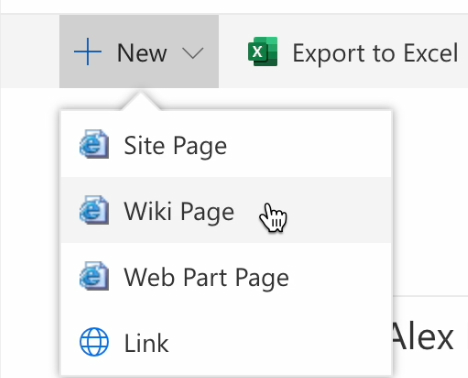
Click “+New” and select “Wiki Page.”
Give your page a name and click “Create”.

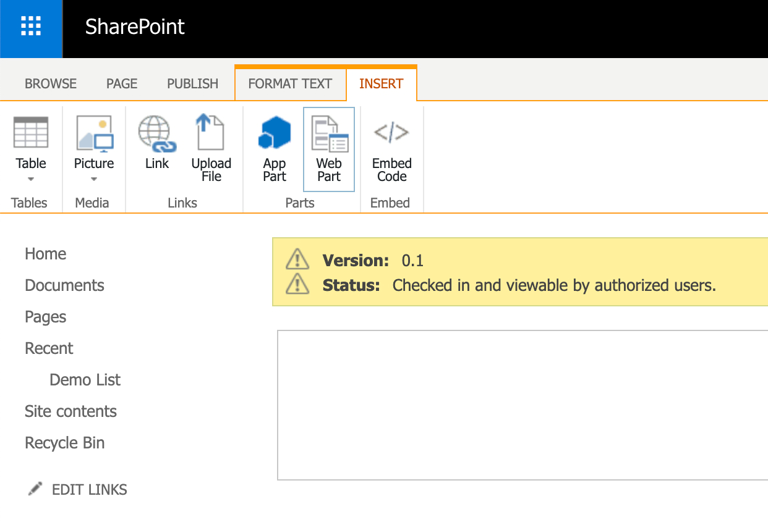
In the “Insert” tab, find and click the “Web Part” icon.
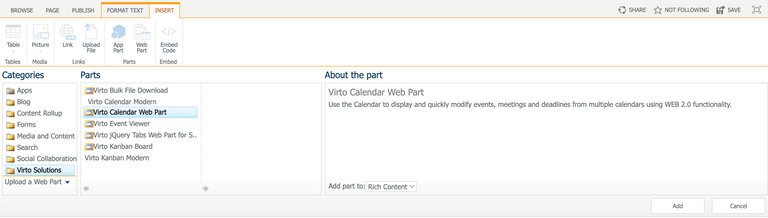
In the Categories section, locate and click the “Virto Solutions” folder, then select “Virto Calendar web part”. Click “Add” on the right side of the page.
Click “Save” in the upper right corner.

Your Virto Calendar is now ready to use.
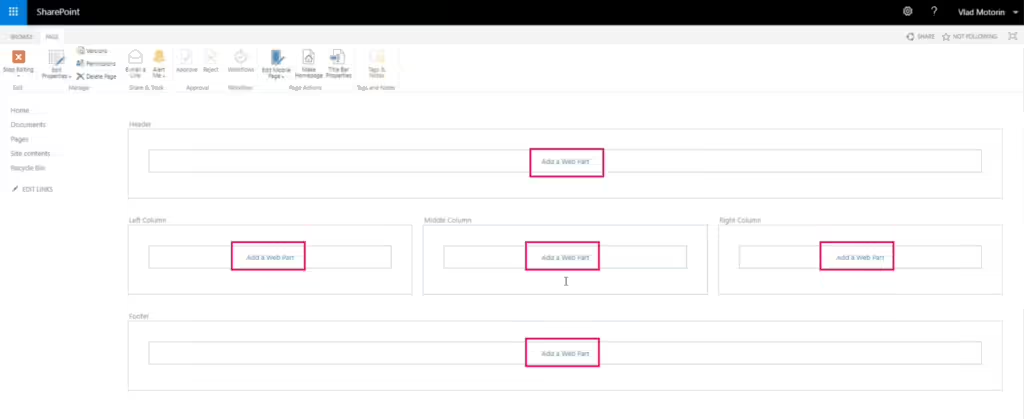
Web Part Page#
Click “+New” and select “Web Part Page.”
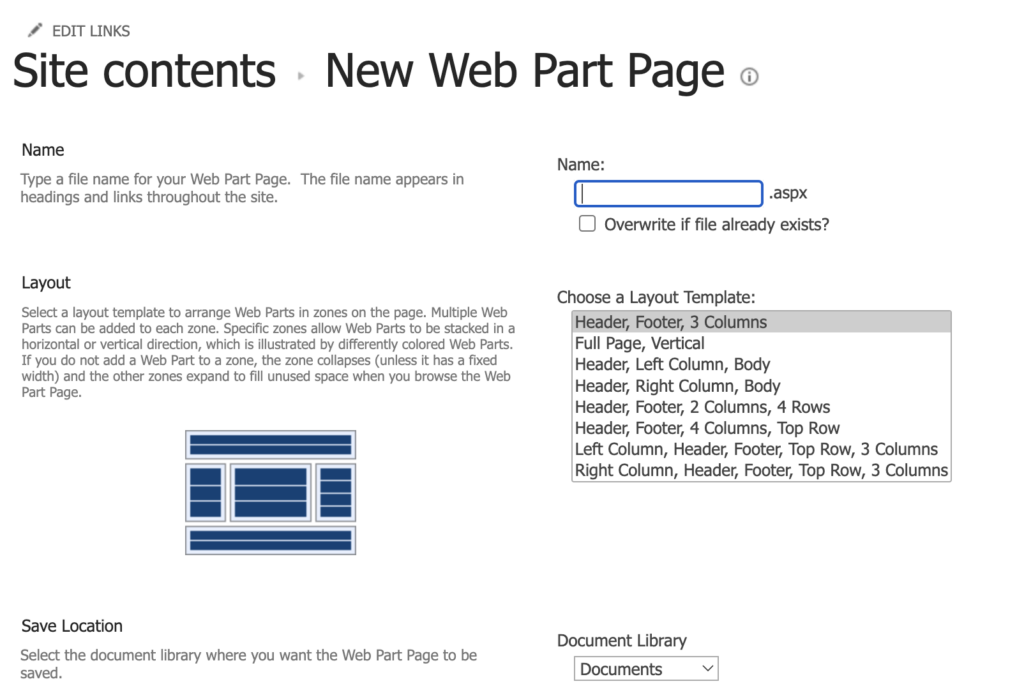
Enter the name of your page, choose a layout, and select the location where you want the Web Part Page to be saved.
Add your web part to any available location within the chosen template. Simply click “Add a Web Part” and follow the same two last steps described for a "Wiki Page."