Getting Started
You have just installed Virto Alerts and Reminders by Virto. What’s the next step?
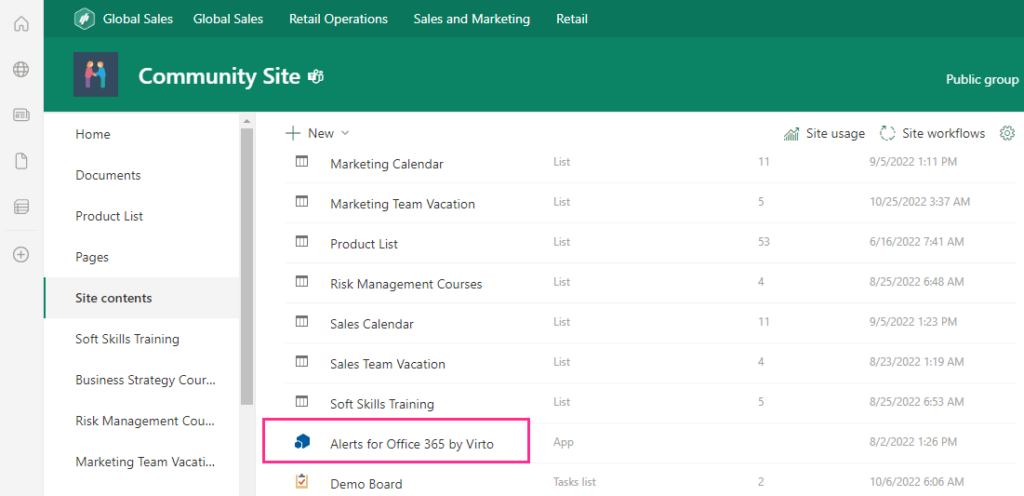
Open the site contents of the SharePoint site where you have installed the app and click “Alerts for Office 365 by Virto.”
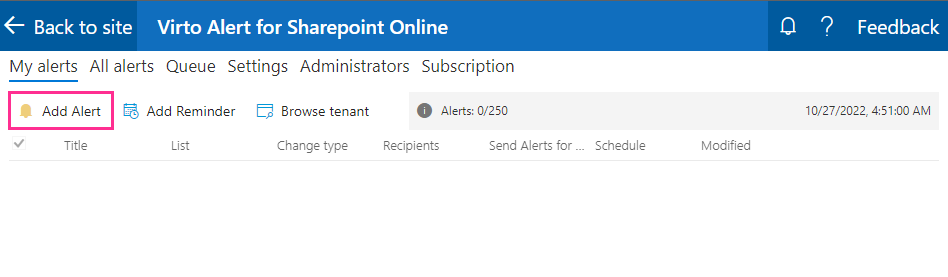
Here is the Alerts App page. To create your first alert, click “Add Alert.”
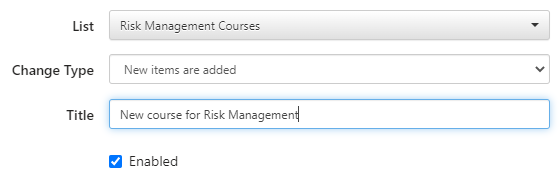
Choose a SharePoint list.
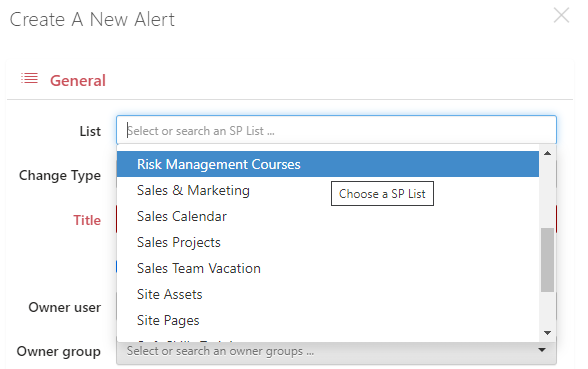
Alerts are always related to a SharePoint list. To send an automatic alert, you need a trigger— for example, the deletion of or an amendment to an item in a list.
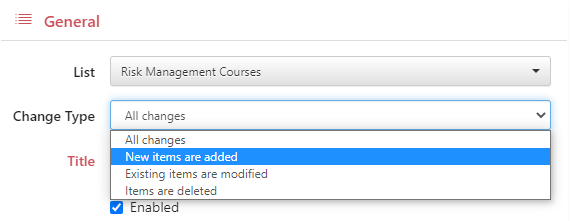
Decide whether you want alerts to be sent for every single change using the “Change Type” drop-down menu.
Specify the name of the alert and tick the “Enabled” checkbox.
By default, you will be the owner of the alert and have permission to make any changes. You can choose another user or group to be the owner if required.

Now you can click “Recipients” to define who will receive the alert. Remember to change the “From” address to your company email. By default, the system uses “no-reply@virtosoftware.com.”
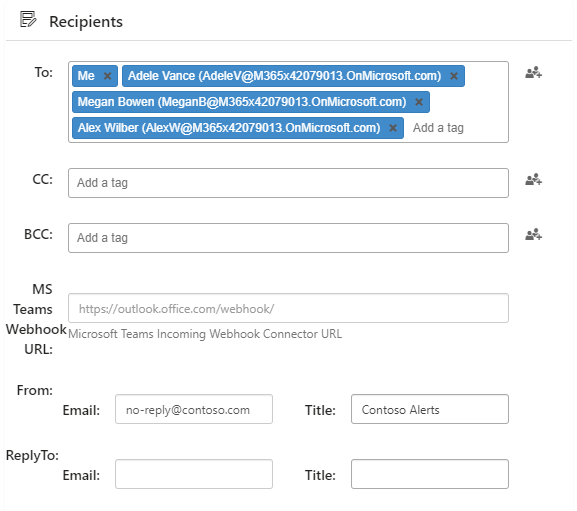
You can add a Microsoft Teams webhook and send alerts directly to a Teams channel.
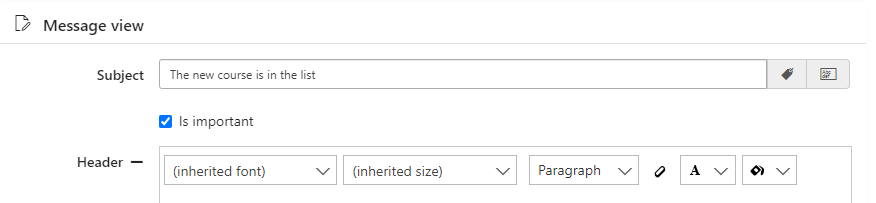
When you have added all the recipients, click “Message view.” Here you can fine-tune the appearance of the email message.
Specify the email subject and add the importance marker if required.
You can use tags in the alert subject and automatically insert variable elements from the list; for example, the email subject can include the list item name, which will vary depending on the list changes.
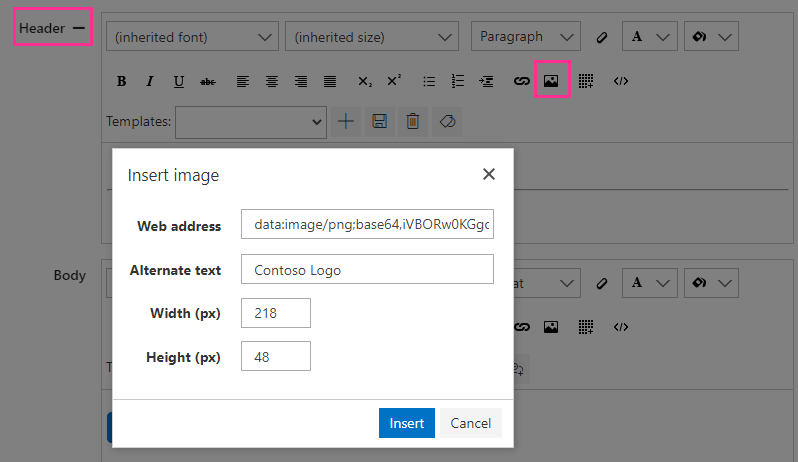
Choose whether to use a header and footer for your alerts; for example, you can expand the “Header” block and add your company logo. Add and adjust a footer in the same way.
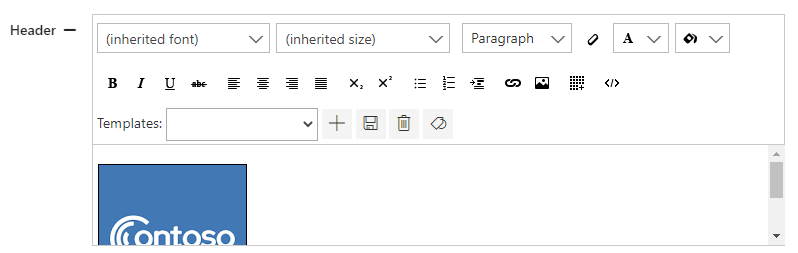
To add a picture to the header, click the image icon and insert the direct link to the image in the “Web address” field. You can also add alternate text. Define the width or height if you need to change the original parameters of the image.
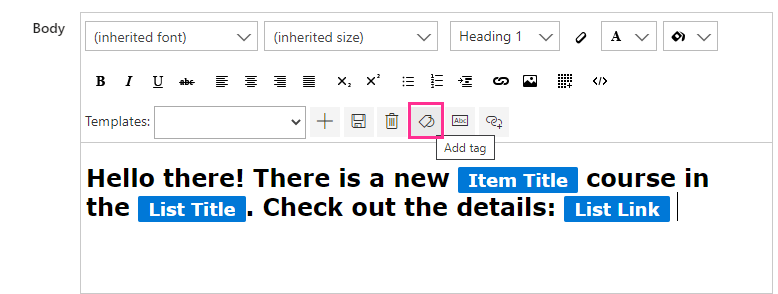
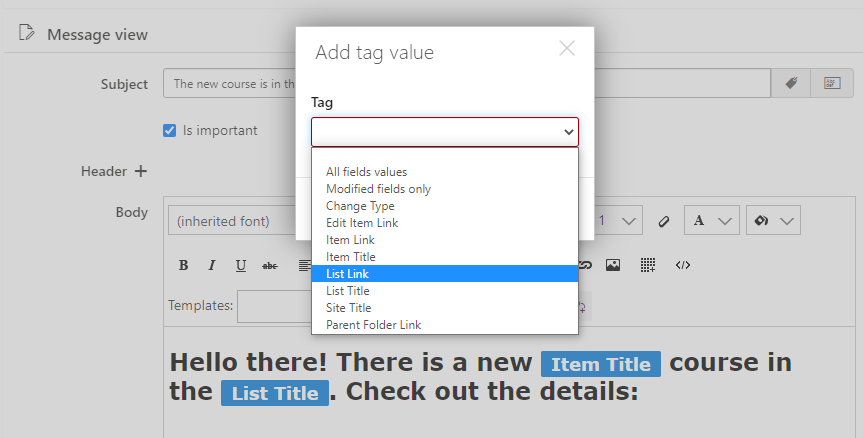
To adjust the message body, you can type in any text, add images or links, use tables or add tags. With tags, you can add variables to the message; for example, if you want to inform recipients about a new training course in a list, you can add the “Item Title” and “List Title” tags to display the course name and the list name. In the same way, use the “List Link” tag to add the link to the alert. To add tags, click the tag icon and choose the required tag from the drop-down menu.
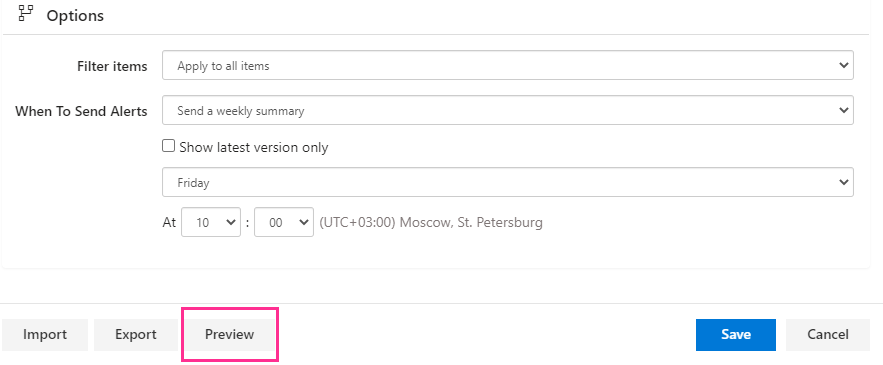
Finally, switch to the “Options” block to define the conditions for sending the alert.
You can filter items and send alerts only for particular items.
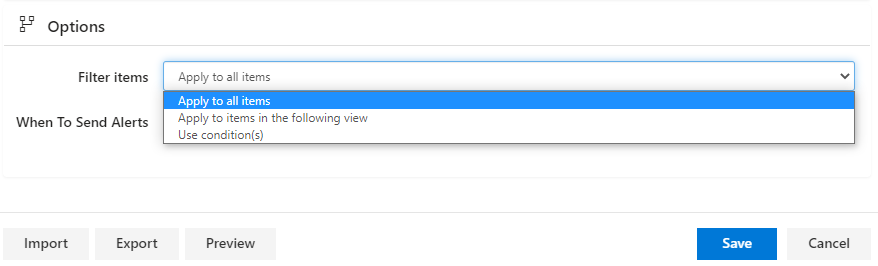
Define when to send the alert; for example, we want to receive a weekly summary alert for all list items every Friday at 10 a.m.

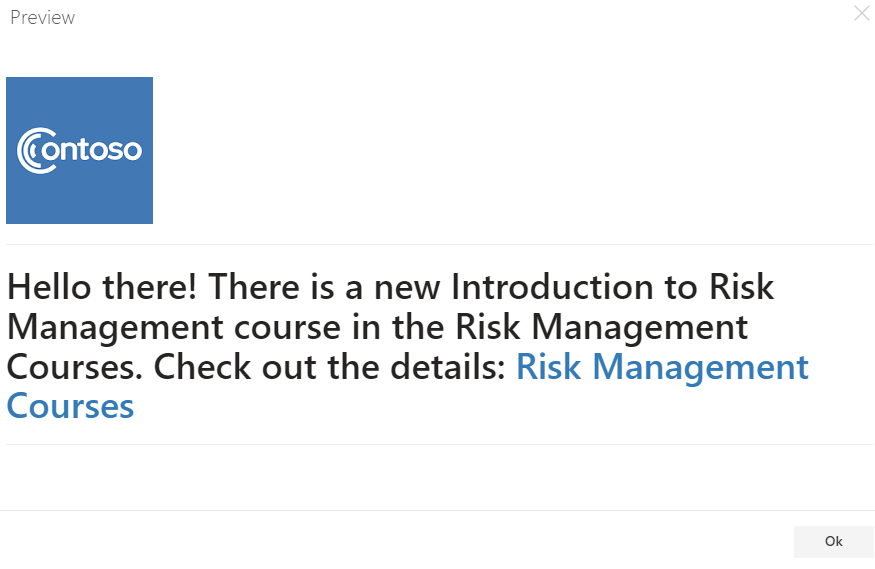
Click “Preview” before saving.
Check the result and save the new alert.
The new alert will appear in the list of alerts.

Now the recipients will receive the weekly summary of items (in this case, new courses) added to the chosen list.

Got 2 minutes? Check out a video:
Book a free 15-minute meeting with our technical team if you have any questions regarding setup, features, or pricing.