Site settings
To access site settings in SharePoint On-Premises, follow these steps:
- Navigate to your SharePoint site.
- Look for the gear icon (⚙️) in the top-right corner of the page and click on it.
- From the dropdown menu, select “Site settings”.
If you don’t see the “Site settings” option in the dropdown menu, try these alternative methods:
- Click on “Site contents” in the left navigation pane or top menu bar.
- Then click on “Site settings” in the top navigation bar.
For some sites, you may need to:
- Click on “Site information” after clicking the gear icon.
- Then select “View all site settings”.
If you’re using a modern SharePoint interface and still can’t find the site settings, you can try:
- Appending “/_layouts/15/settings.aspx” to your site’s URL in the address bar.
- Press Enter to directly access the Site Settings page.
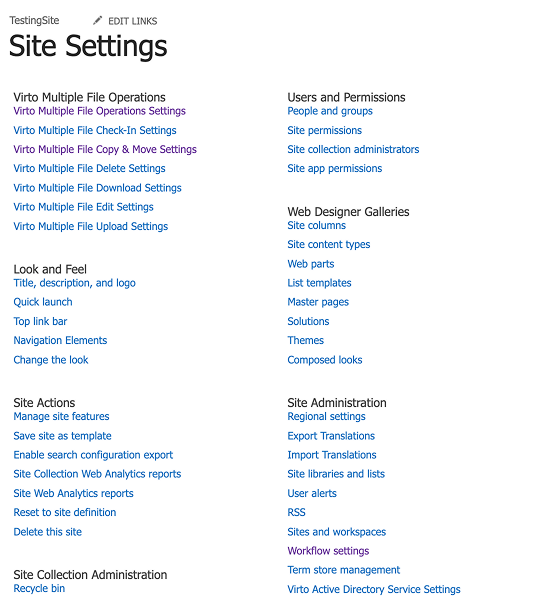
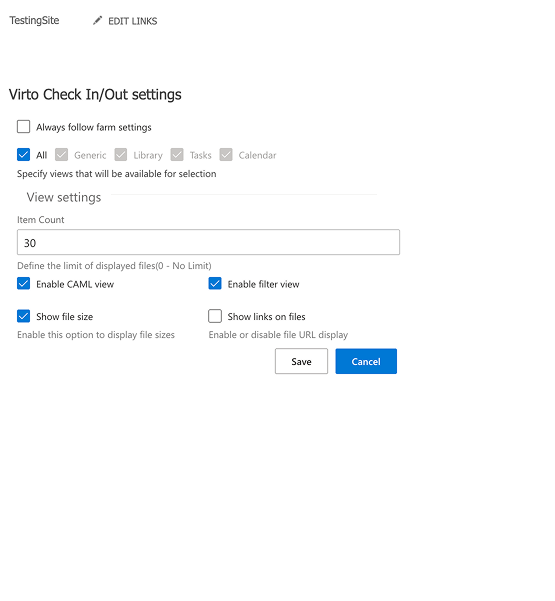
In these settings, you can choose:
- Where to show multiple file check in/out:
You can control where the multiple file check in/out functionality appears. For example, unchecking “Generic” will prevent the button from showing in lists. (to enable the selection, unmark “Always follow farm settings” and unmark “All”.) - The limit of displayed files
- A default view type
- Enable CAML/filter view
- Show file size