General settings
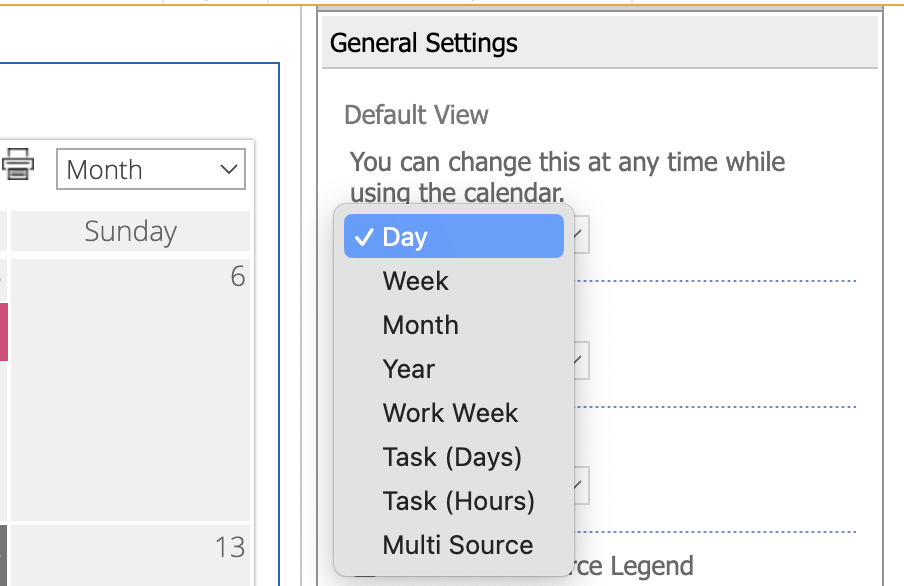
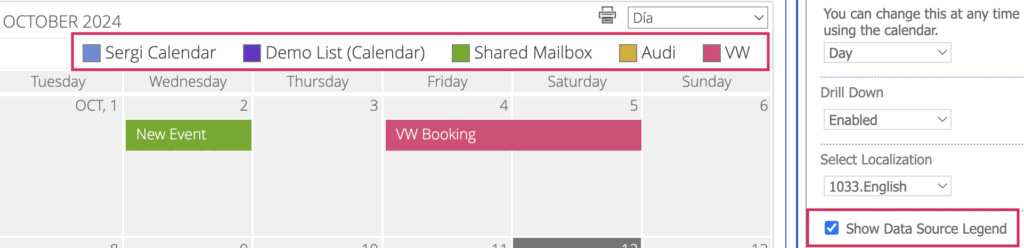
You can set the default view that will be displayed when you open the calendar page by selecting the desired view from the dropdown menu (Day, Week, Month, Year, Work Week, Task (Days), Task (Hours)).
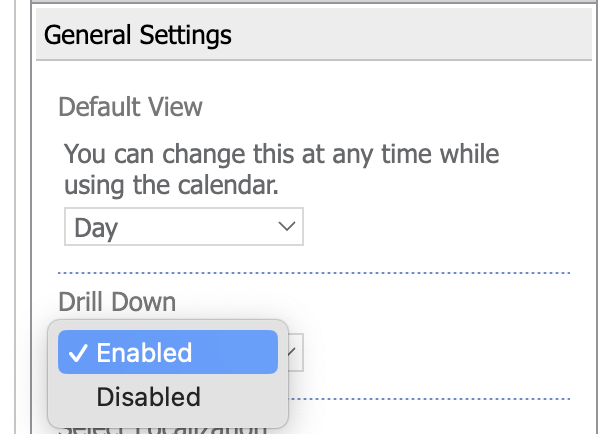
If you need to view a specific day from the Month view, simply click on the desired day (the number). Similarly, you can navigate to any month from the Year view by clicking on it.
To enable this feature, select “Enabled” in the “Drill Down” field.
You can select the desired language for the calendar from the following localizations: English, German, Czech, French, Spanish, Russian, Chinese, and Swedish.
Calendar localization is independent of SharePoint localization.
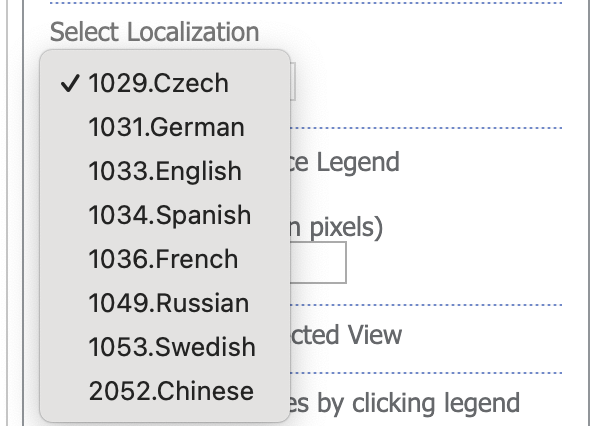
Select a localization from the list and apply the changes.
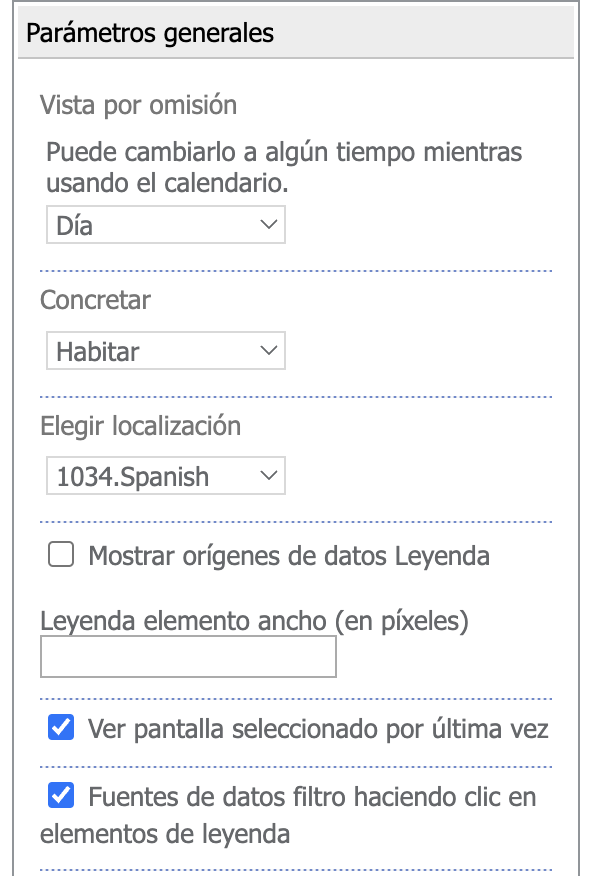
To see which colors correspond to different data sources, you can display a color legend in your calendar. It is possible to show or hide all events from a specific data source by clicking on its corresponding icon in the data source legend.
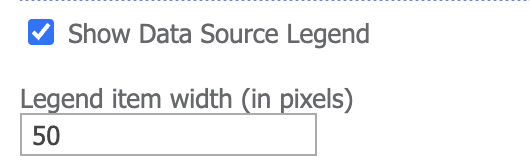
Check the box “Show Data Source legend” in the “General Settings” section. If you need to adjust the width of the legend elements, enter the desired size in pixels and click “OK” to save the settings.
You can also enable or disable the option to save the last selected view of your calendar. If this option is checked, users will see the view they last selected when reopening the calendar.
The next option enables filtering, allowing you to show or hide events from a chosen data source in the calendar.

Additionally, you can set a custom time and date format if needed. You can use custom date and time format strings and enter them in the general settings section.

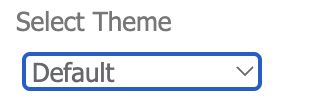
You can also use different themes for the calendar by applying a custom CSS file to the web part.
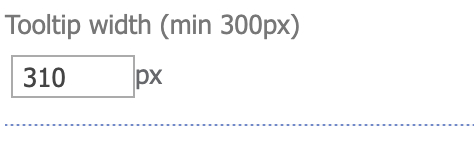
It is possible to adjust the tooltip width, which is useful when the text of an item description is too large. The default and minimum size of a tooltip is 300 pixels.
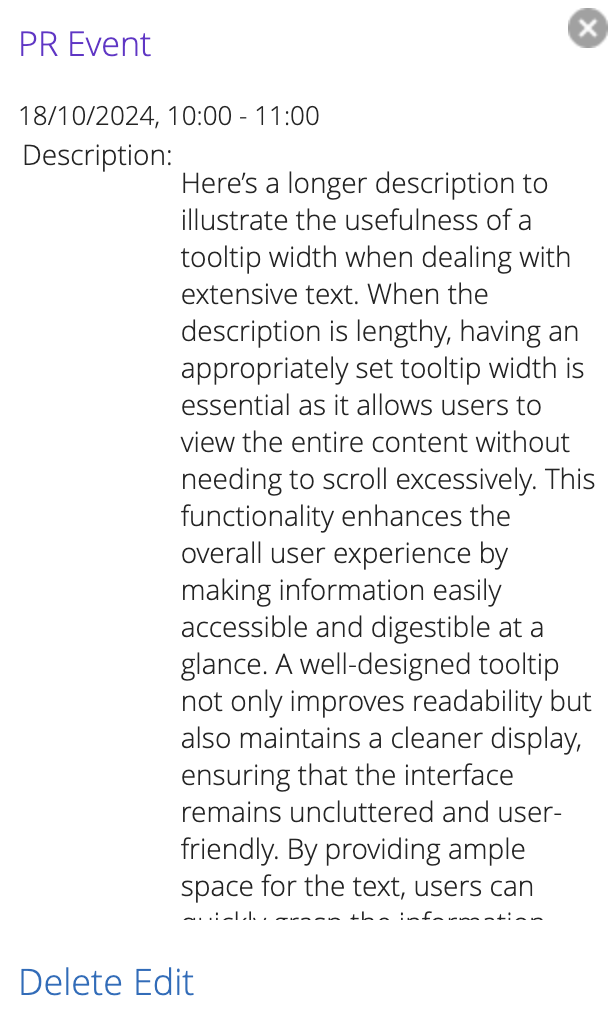
If a description is too lengthy, the tooltip may have a long scroll:
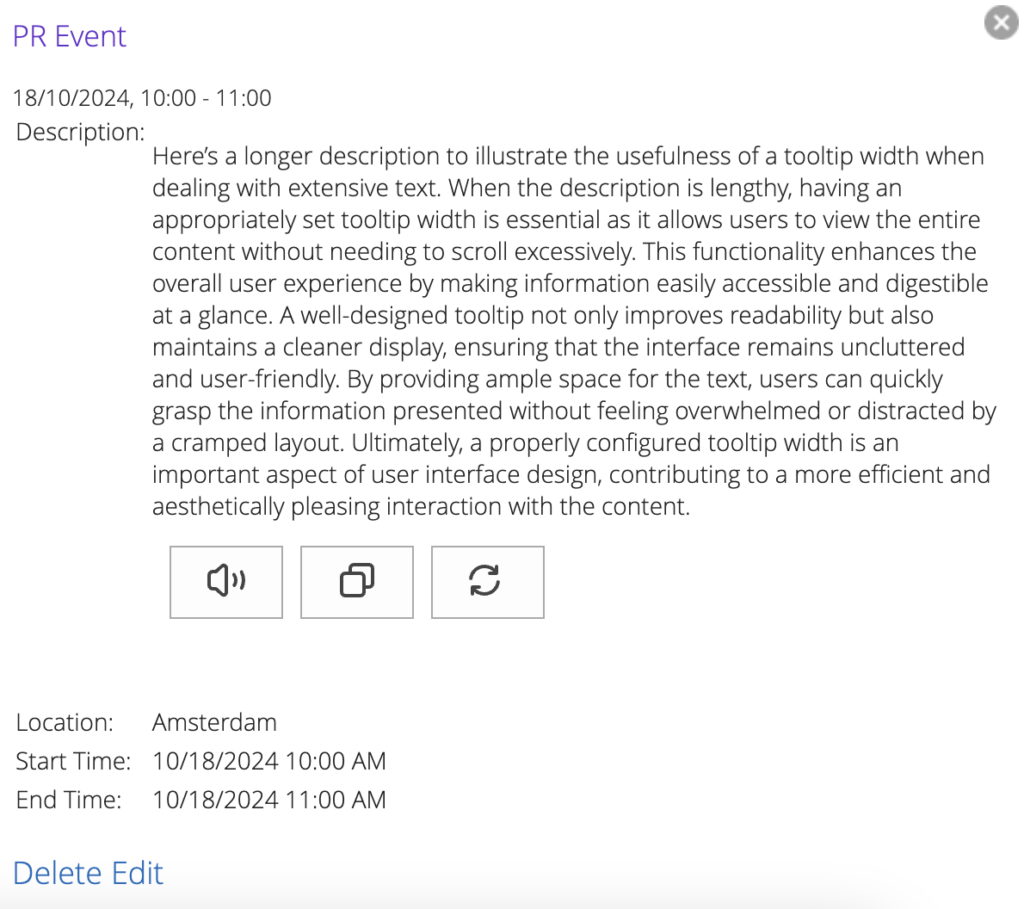
Assigning a tooltip width of 600 pixels can make it look much better:
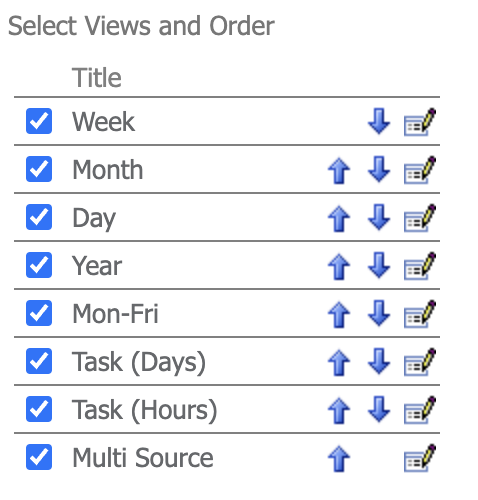
Views and tabs order#
You can hide some views in the calendar. To do this, uncheck the boxes next to the views you want to hide.
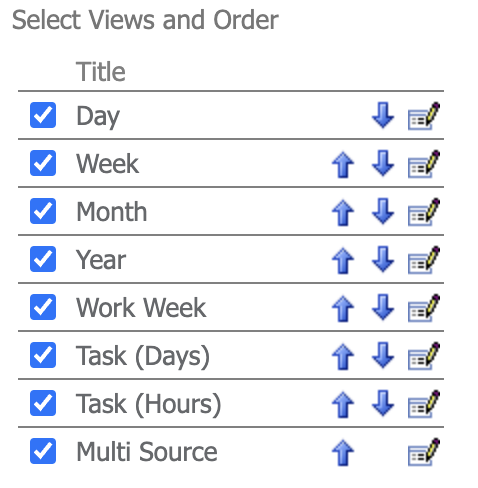
You can also change the titles and positions of the views. Use the “Edit” button next to the title you want to change. Type in a new title or select the desired position, then click “Save” icon.
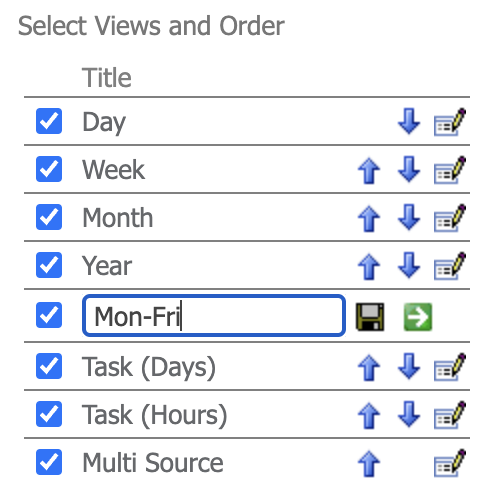
Click on the arrows if you want to change the position of the views. Don’t forget to scroll to the bottom and “Apply” your changes!
Security Settings for Calendar Properties#
The Virto SharePoint Calendar allows users to select SharePoint groups and/or users who will have permission to edit web part settings.
Open the web part settings and scroll down to the security settings block.
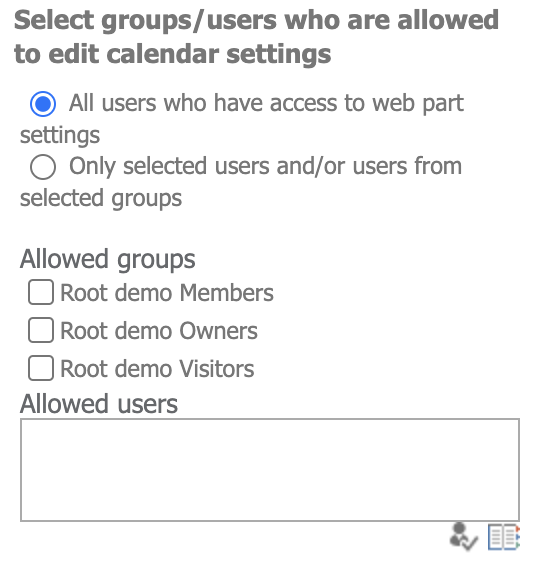
You can select “All users who have access to web part settings” to allow all SharePoint users to edit the web part. Alternatively, select “Only selected users and/or users from selected groups” and choose the groups with access to the web part settings.
Selected groups must have predefined permissions (see SharePoint site settings).
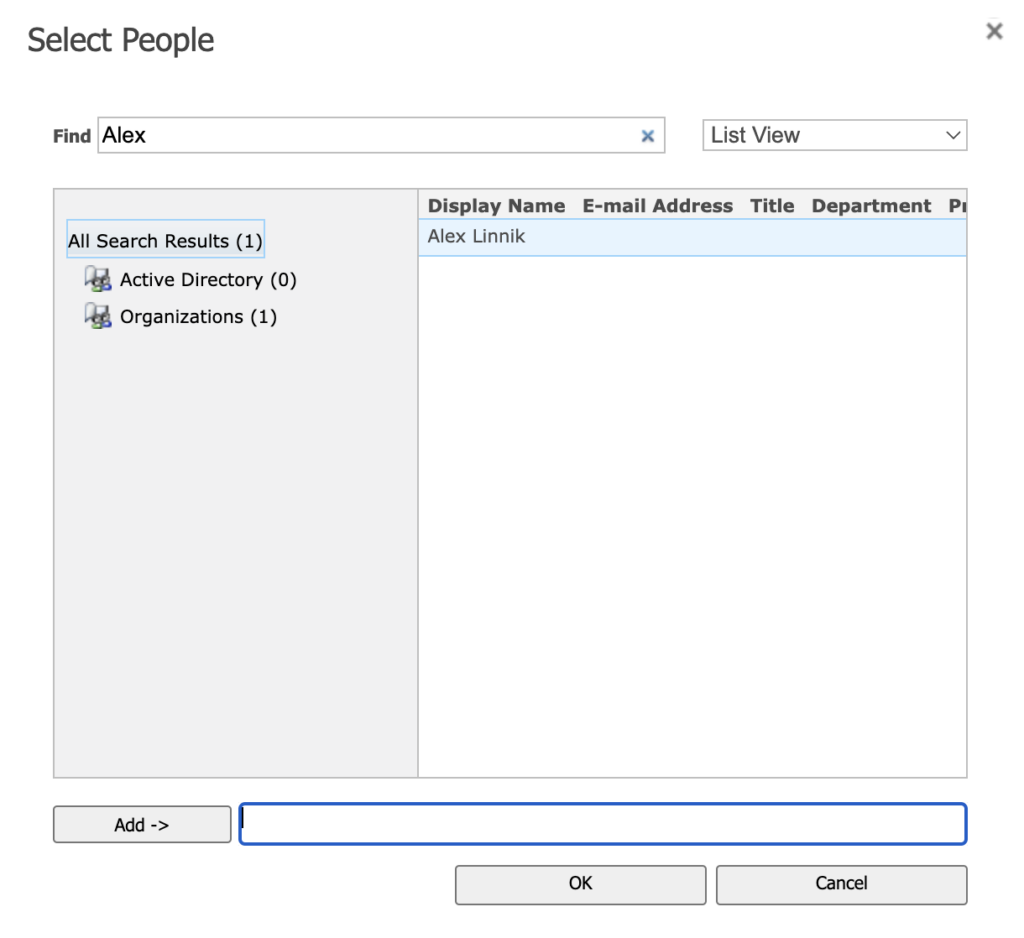
You can also grant access rights to selected users by typing their Name and Surname and clicking “Check Names” or by using the “Browse” button to add a user.
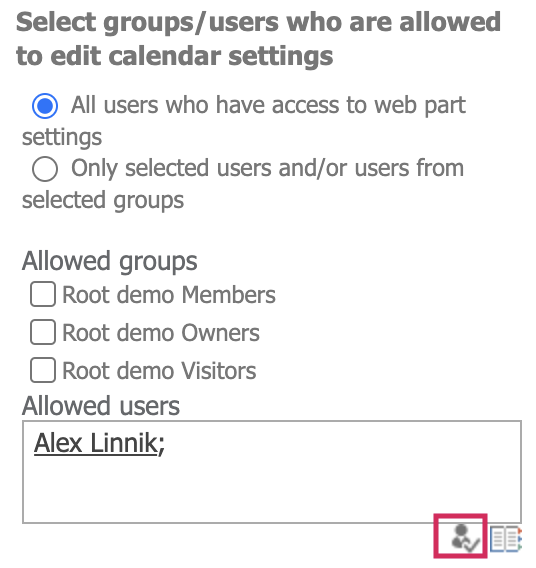
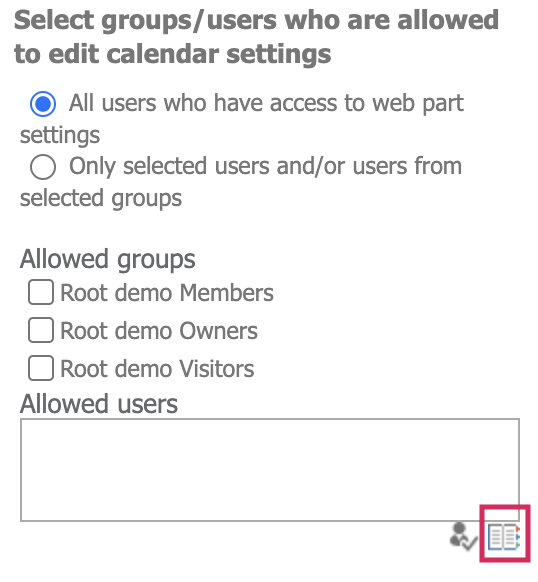
If a user (or multiple users) from a SharePoint group is selected as having access to web part permissions, but the group they belong to is not checked, this user(s) will still have access to the web part settings.