Installing the SPFx web part
The Virto Multiple File Operations web part for SharePoint 2019 (SE) can be used as a SharePoint Framework (SPFx) web part. Follow the steps below to start using the web part on modern sites and pages in SharePoint 2019.
1) Create a Tenant App Catalog in your SharePoint if necessary.
2) Download the .sppkg file. To install the Virto Multiple File Operations web part, run the Setup file under the farm administrator account (right-click the Setup file and choose “Run as administrator“).

The “virto-multiple-file-operations.sppkg” file will be automatically uploaded into “Apps for SharePoint” in your Tenant App Catalog. However, please check your app catalog for the existence of the file.
Now you can add the Virto Multiple File Operations web part to the modern pages or sites.
Warning! Please do not use the service administrative account to install and activate the SPFx web part on your sites.
Installing the web part
Before you begin, ensure you have access to the server and that your account has the necessary administrative privileges to install applications.
To access the Virto Multiple File Operations setup program, download the .zip file from the product page and unzip it (using “Extract All”). Run the extracted Setup file.
The installation process is the same for all SharePoint versions. If you’re installing Virto ONE, follow the same steps.
The setup wizard window will appear.
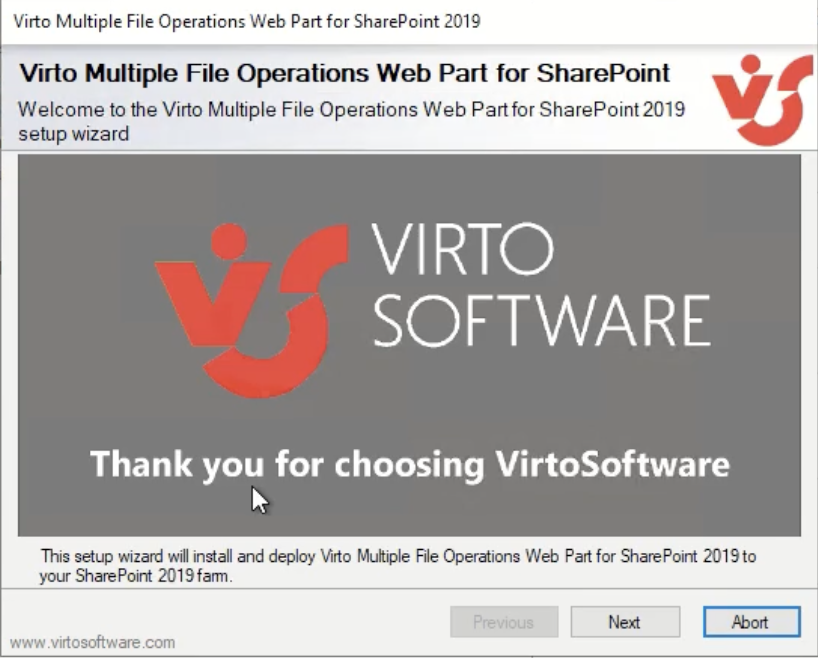
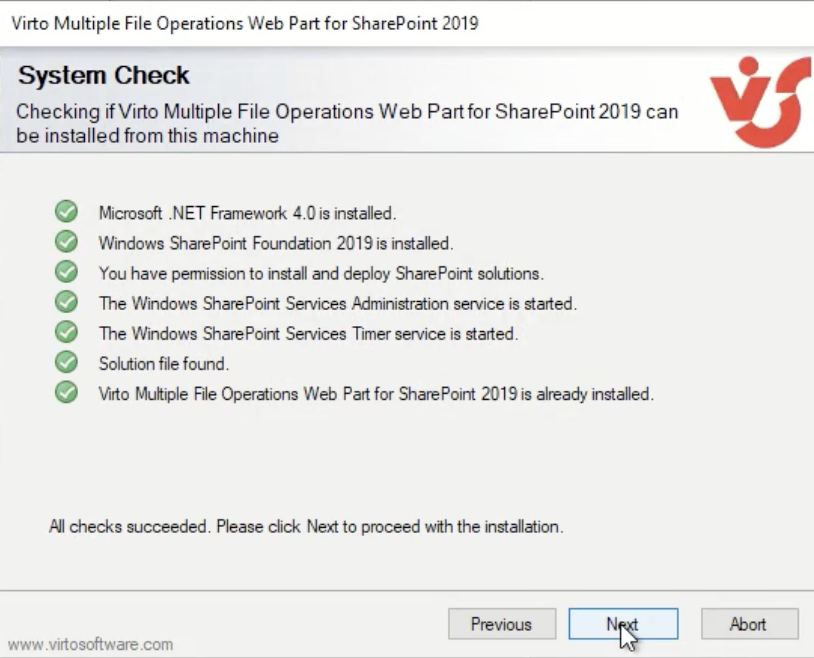
The Virto Multiple File Operations setup wizard will perform a system check before the installation. Once all the checks have been completed, click “Next.”
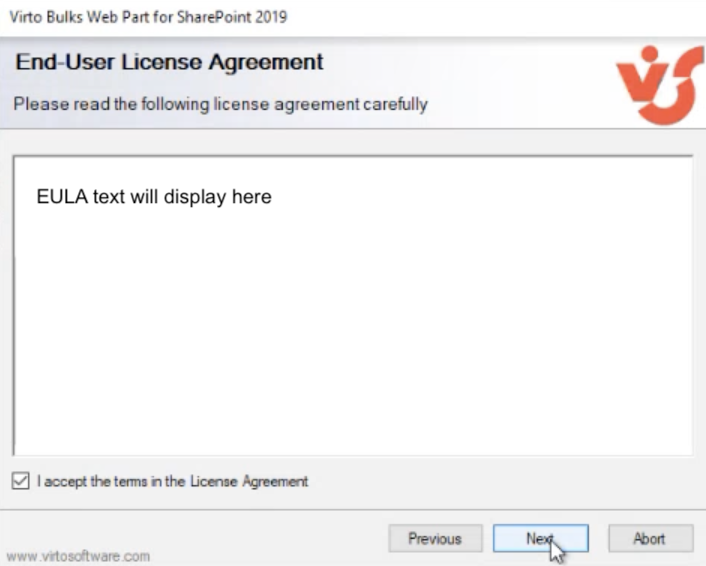
Tick the checkbox “I accept the terms in the License Agreement” and click “Next.”
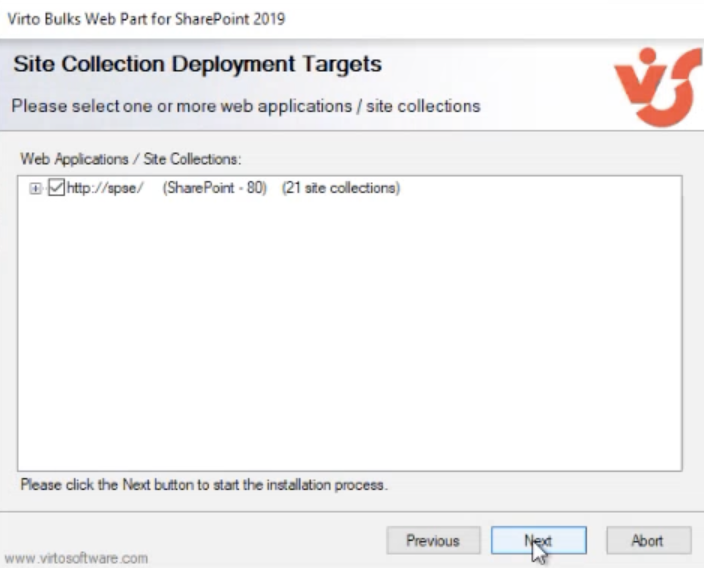
Select the web applications / site collections where you want to install the product, then click “Next.”
Wait for the product to install. Click “Close” to complete the installation.

If you have any questions about setup, features, or pricing, book a free meeting with our technical team.