The columns you see on the Kanban board (for example, To do, In progress, Completed) are based on a choice column in the underlying SharePoint list, such as Status or Progress.
NB: When you add or edit values in that list column, they become available as options when configuring board columns, but the columns on the Kanban board are not created or updated automatically—you still need to add or adjust them manually in the board settings.
To edit the list column values:
- Open the SharePoint list that is used as the data source for your Kanban board. Check out: How to configure board for an existing list for more info on how to do that (TL;DR: Open your Kanban Board -> Edit board -> List Setup -> Board lists -> [List name])
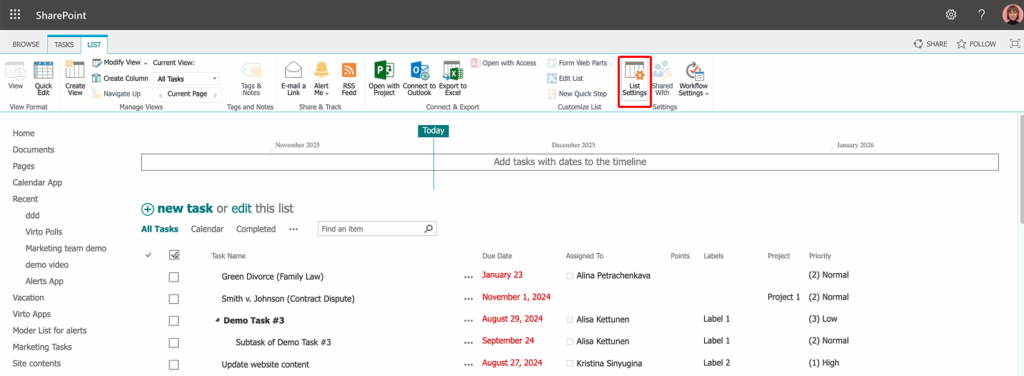
- Select the Settings gear in the top-right corner and choose List settings (alternatively, select a gear icon near your list’s name in the Kanban board lists’ settings).
- In the Columns section, click the column that is used in the board’s Columns settings (for example, the Status column).
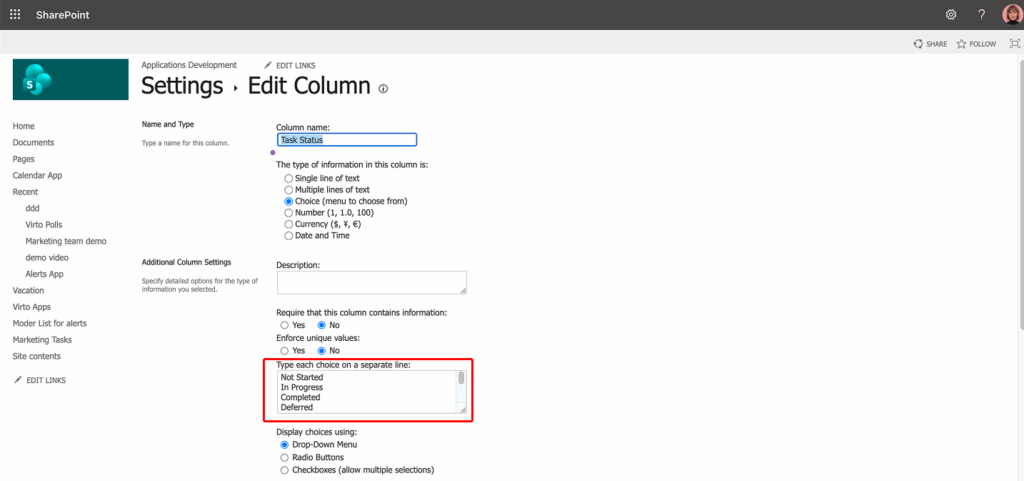
- Make sure the column type is Choice.

- In the Choices area, add, edit, or remove the values you want to use as board columns.
- Enter one value per line (no commas), for example:
BacklogTo doIn progressReviewCompleted
- Arrange the values in the order you want them to appear from left to right on the board.
- Enter one value per line (no commas), for example:
- Click OK to save your changes.
How these changes appear in Virto Kanban Board App
- Open your Kanban board.
- Go to Board setup > Columns.
- Make sure the Column field is set to the list column you edited (for example, Status).
- Any new choice values you added in the list now become available as board columns. Here you can:
- Enable or disable specific columns.
- Change the column order.
- Configure additional options such as WIP limits or counters (if used).
- Save the board settings.
From this point on:
- Each card’s position on the board is based on the value of that list column.
- Dragging a card from To do to Completed updates the underlying Status field in the SharePoint list automatically.
For more details on working with SharePoint list columns, see Microsoft’s official article:
Create a column in a list or library.
Now, we’ll explain how to change column order or name directly within the Kanban Board App.
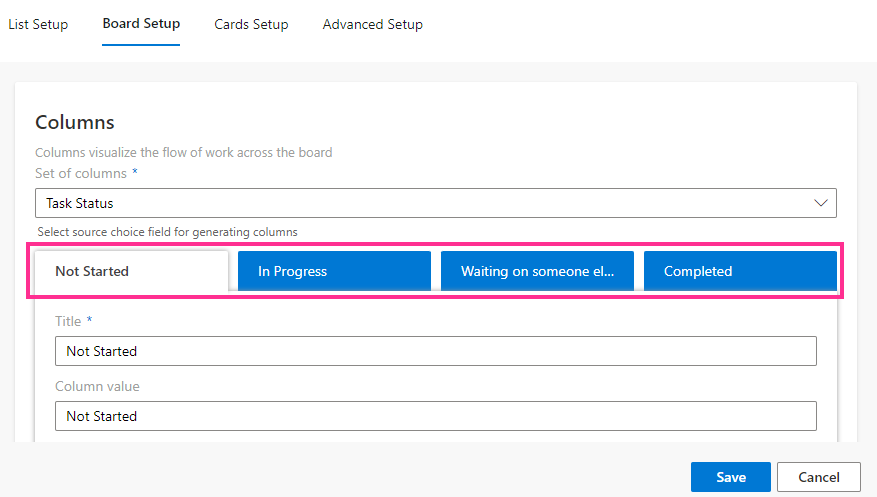
Usually, columns visualize the workflow across the Kanban board, though you may have your own concept and apply another field for columns. To do so, open the “Set of columns” drop-down list to generate columns for your Kanban board. The field you select must be of the “choice” type (providing a menu to choose from).
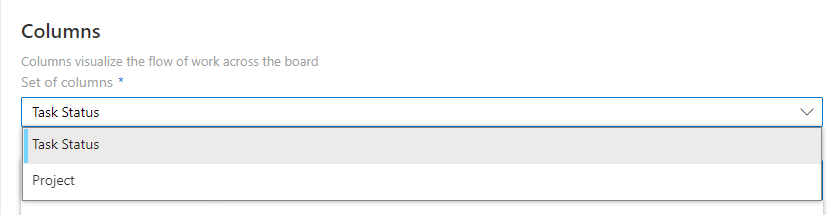
When you have assigned a field for columns, all choice values (that is, all menu options) from this field will be displayed as columns. You can now choose the exact columns that will be displayed on the board.
Click “…” next to a column name to define the position of the column (by moving it left or right) or delete it.
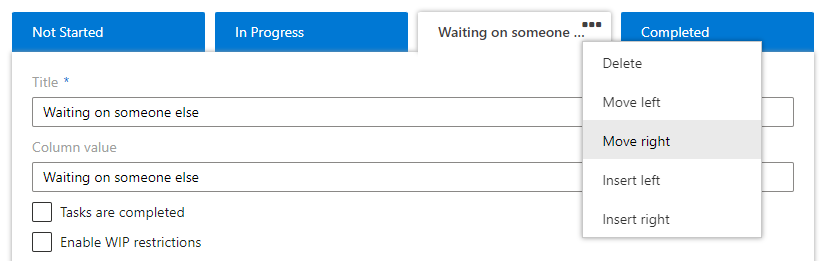
By default, all available columns are added to the board. The “Insert left” and “Insert right” options let you add new columns or restore ones you previously deleted. For example, if you add a new choice in the list settings as described earlier in this section, save your changes, reload the Kanban board, then click “Insert left/right” and select the new value from the list—the corresponding column will be added to the board.

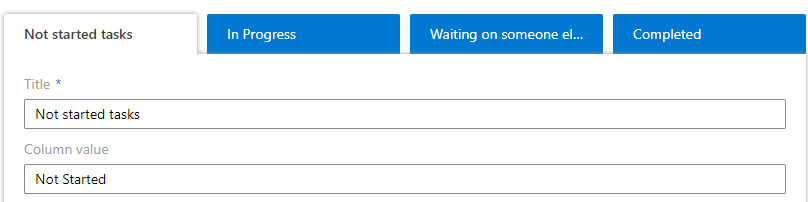
You can also specify a custom title for each column.
The column name will stay the same in the list.
Additionally, you can set the maximum number of tasks permitted in a column.
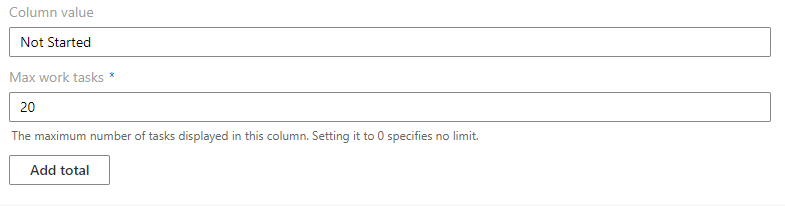
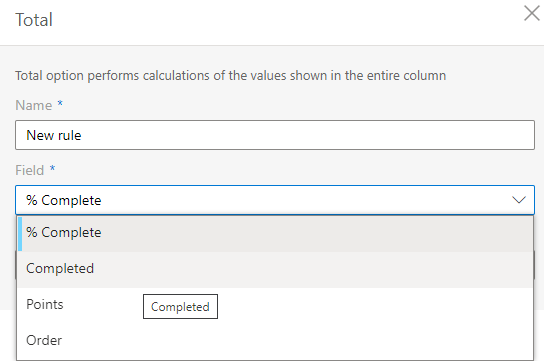
If you click “Add total,” you can create rules for counting tasks in a column.