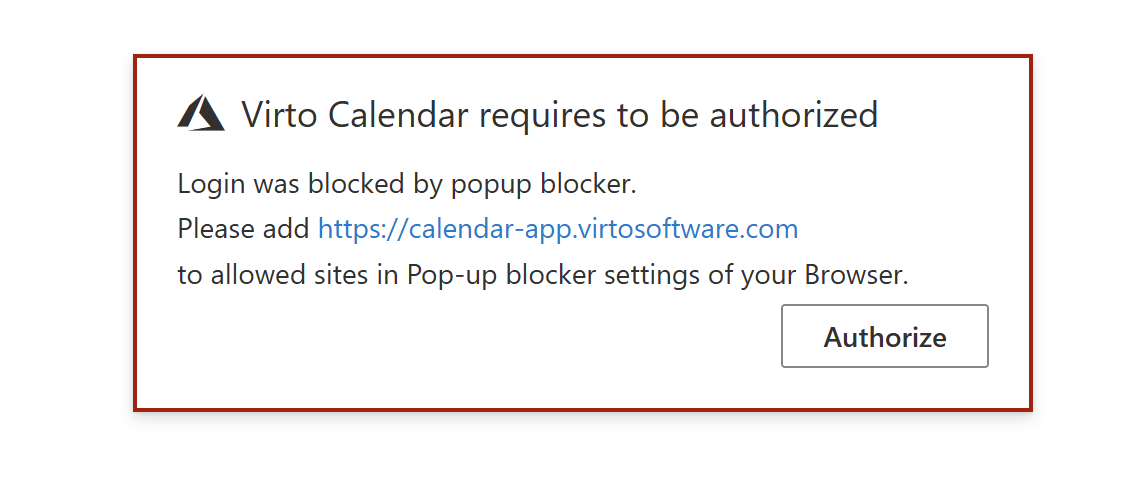
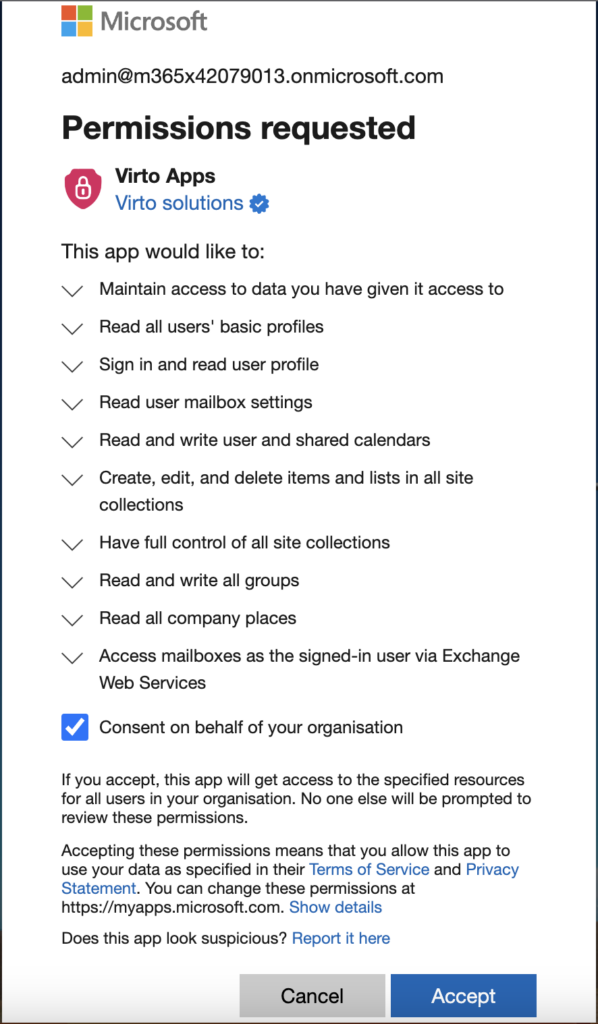
In this step, you will see permission request. Click “Login to Azure AD.”
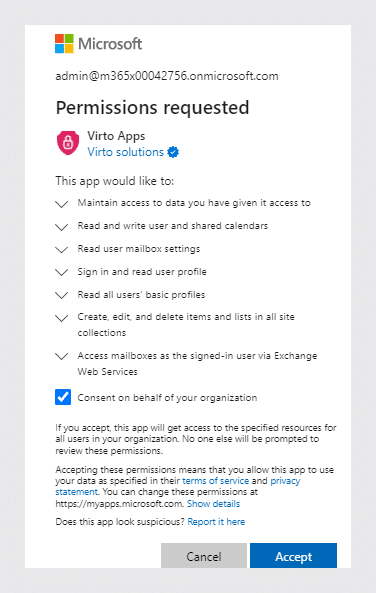
If you have tenant administrator rights, check “Consent on behalf of your organization” and click “Accept.” Alternatively, contact your Tenant Administrator to do this.
By checking this box, the administrator authorises all users in Azure so that not every user receives the permissions request pop-up all the time when using the app.
If you don’t receive this alert message, just skip this step.
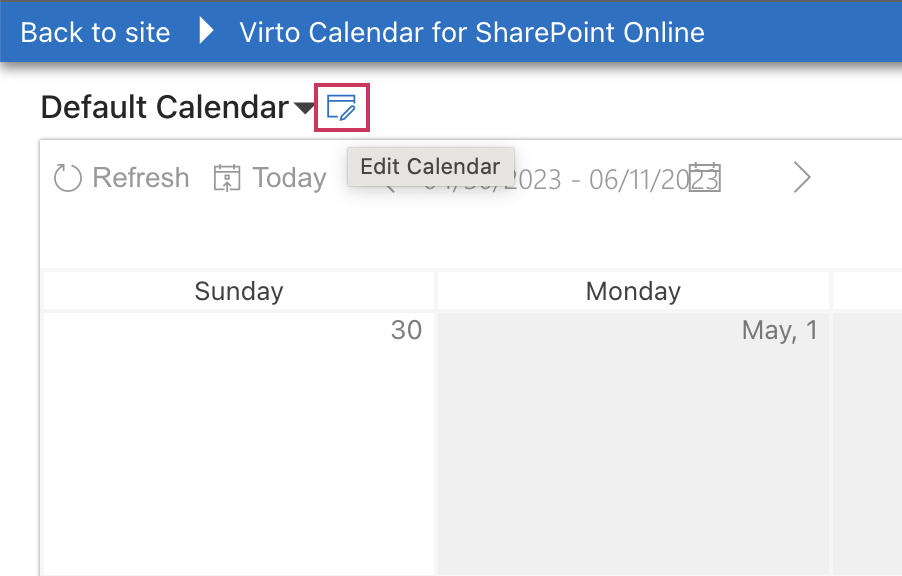
Next, the administrator should open the Virto Calendar App and click the “Edit Calendar” icon on the top left.
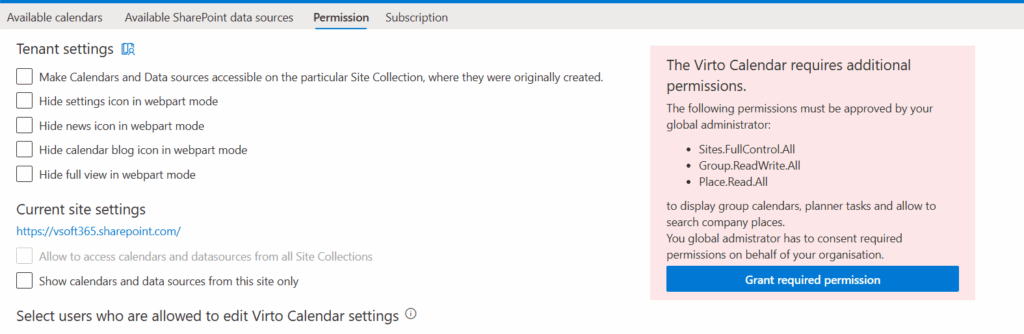
In the calendar settings, the administrator will see a message on the right-hand side stating that Virto Calendar App requires additional permissions.
These permissions need to be granted to the application so it can identify the type of user (site administrator, some other user with permissions, etc.) to be able to create and edit information in the application.
As the administrator, click on “Grant required permission.“
A window with an expanded list of required permissions to use the Virto Calendar App will open. Click the checkbox and the “Accept” button.
There are two levels of permissions that are relevant to the Virto Calendar App. Please check the User Permissions for more detailed information.
Permissions are required to enable the calendar overlaying feature of the Virto Calendar App. However, please note that these permissions are delegated and activated only by a specific user from your company with their permission.