
Working with Workflow Scheduler as a Web Part
Virto Workflow Scheduler is part of Virto Workflow Automation. It is available on the Virto Workflow Scheduler page in Site settings and as a web part for classic pages and, on SharePoint Server 2019 and Subscription Edition, for modern pages. The web part is named Virto Workflow Schedule on classic pages and Virto Workflow Scheduler on modern pages.
Add Virto Workflow Scheduler to a classic SharePoint page
- Go to the SharePoint site where you want to add the web part and click Edit on the page toolbar.
- In edit mode, move to the zone where you want to place the web part and click Insert, then Web Part on the ribbon.
- In the web part gallery, find Virto Workflow Schedule, select it and click Add.
- Click Stop Editing to save the page.
- To change the title or the size of the web part, open its menu and click Edit Web Part.

The tool pane has About and the standard Appearance group. Unlike Virto Workflow Status Monitor, the Scheduler web part has no settings of its own.

Add Virto Workflow Scheduler to a modern SharePoint page
Before you start, deploy virto-workflow-automation.sppkg and add the app Virto Workflow Automation to the site collection, as described in Modern pages.
- Open a modern page and click Edit, or create a new page with New.
- On the page canvas, click the + icon in the section where you want to add the web part.
- In the web part picker, search for Virto Workflow Scheduler and click its tile to add it to the page.
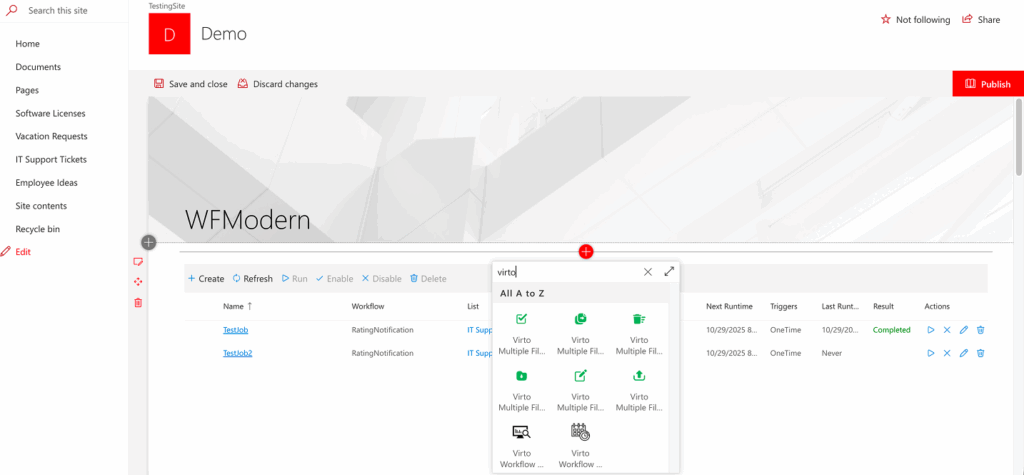
- To set the size of the web part, click the Edit web part (pencil) icon. The property pane has only the Appearance group: Height, px (400–2000) or Adjust webpart height, and Width, px (350–1200) or Adjust width to fit page.

- Click Publish (or Republish) to save the page.
Working with schedules in the web part
The web part shows the list of schedules with the same commands as the Virto Workflow Scheduler page: Create, Refresh, Run, Enable, Disable and Delete. See Creating Workflow Schedule.